
Until now we've never tried cheesemaking, but this last week we finally rectified that situation, starting out by making a delicious creamy ricotta right on our stove at home.
To make ricotta you'll need a very large pan - ideally stainless steel but anything that doesn't have a teflon style coating will work - and the following ingredients:
- 1 gallon whole milk
- ½ cup heavy whipping cream
- 2 tsp non-iodized salt
- 1 tsp citric acid
Unlike most other recipes, cheese making is an instance where you can't swap out ingredients and still get the same result. Make sure NOT to use ultra-pasteurized milk or iodized salt, as these can both prevent the curds from forming and you'll just get burned milk instead of cheese.

Mix all the ingredients together and very slowly raise the temperature to 184 degrees Fahrenheit - this is where an instant read digital food thermometer comes in very handy! We turned our stove to the "4" setting and it took about an hour and 45 minutes to hit the right temperature.

Eventually curds will start to form in a layer on the top of the milk. Every now and again be sure to use a rubber spatula to scrape the bottom or you'll get burned cheese. It won't seem like enough curds are forming at first when you finally get up to temperature, but don't worry, you're on the right track!

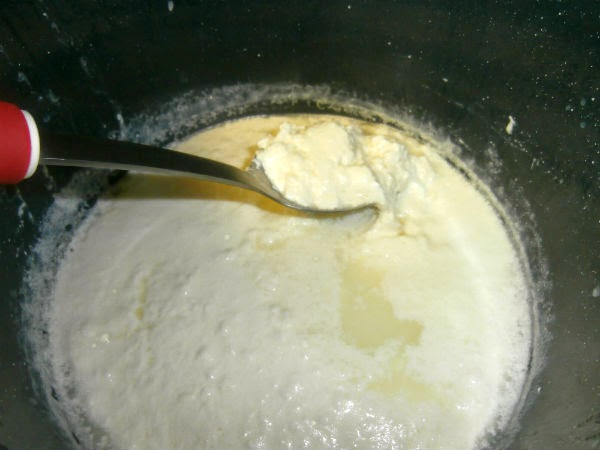
As soon as you hit 184, remove the pan from the heat, cover with a lid, and let it sit 15 minutes to allow the curds to finish forming. Here's our first batch after the cooling process has finished as we're pulling the curds off the whey.
It's looking good already, but it's not quite done yet, as you still need to strain the cheese.

Here we're using a fine mesh sieve to let the remainder of the liquid whey drain out. Originally we used cheese cloth over the sieve, but we found it wasn't really helping and the cheese just stuck to the cloth, so eventually we went with the sieve alone. After the drip dry finishes, this is the time to taste test - if you want, you can fold in either extra salt for more flavor, or extra cream if the ricotta is too thick.

To serve our ricotta we're using baked bread and some garlic cloves. Here we've chopped the top off a few garlic cloves, covered with olive oil, sea salt, and pepper, and wrapped in tin foil. Cook the garlic packet in the oven at 400 degrees for about 35 - 40 minutes.

Squeeze the garlic out of the cloves into a small container and mash them up with olive oil and balsamic vinegar. Add in a dash of pepper for an amazing dipping sauce!

Here's our finished ricotta - topped with some extra olive oil - served with baguette slices and some spinach and mushroom artisan bread we found at the local grocery store.

You can top any of the bread with the cheese, or just straight up eat it with a drizzle of olive oil and pepper. Ours was significantly more creamy and flavorful than the ricotta you'll find at the grocery store, and it was amazingly worth all the extra effort!
