SixSevenEight

SixSevenEight

Monday, September 1, 2014

Culinary World Tour: Spain (Grilled Paella)

In an effort to experience the flavors and cooking styles that ever corner of the Earth has to offer, we've embarked on the "Culinary World Tour," which lets us taste the cuisine of every nation all from the comfort of our own home. If you missed the previous entries in our world tour, check them out using these links:

England: Yorkshire Pudding
Ireland: Shepherd's Pie
Iceland: Lamb Pie With Rye Crust
Greenland: Suaasat
Canada: Poutine
Mexico: Posole

Now the world tour has hit Spain, which has an incredibly versatile range of traditional dishes for us to choose from. Eventually we settled on paella: a classic Spanish rice dish, but we're putting a little twist on it by heading outside and cooking it on the grill!

To make this paella, you'll need:

•    2 cups chicken stock
•    5 – 6 on the vine tomatoes
•    1 - 2 big heaping handfuls of fresh green beans
•    2 bell peppers of your preferred variety – red and green work great
•    1 ½ cups uncooked parboiled rice
•    5 chicken drumsticks
•    2 tbsp. minced garlic
•    2 tbsp. olive oil
•    Seasonings – saffron threads, rosemary, paprika, sea salt, pepper


This is both an indoor and outdoor meal, with preparation taking place both on the counter and stovetop and outside on the grill. To get started, mix together a few teaspoons of rosemary and about 15 or so threads of saffron (both of these will add an amazing aromatic component when cooking out on the grill later) with a few pinches of salt, pepper, and paprika.


Pour the seasoning mixture into the rice and mix together with a spoon, then transfer it all to a container to take outside (we used plastic tupperware containers with the lids on for easy transporting).


Paella is a very versatile dish, as there are many different meat and vegetable combinations out there. One of the most common protein combos used in paella is shrimp and sausage. If you wanted a really authentically rustic Valencian flavor, you could even go all out and use snails and rabbit!

We decided to go a more simple route for our first attempt at paella, using chicken drumsticks. Here I've seasoned them lightly with salt and rosemary.


One interesting aspect of paella that got us outside our comfort zone was how it typically uses grated tomatoes. We'd never even considered grating tomatoes before - always instead going the traditional route of slicing, dicing, etc. To grate tomatoes, first cut them in half to expose the insides.


Next you'll want to scoop out as much of the seeds as possible so you're just left with the tomato flesh.


Press the flesh side of the tomato against the grater (the skin side should be facing away from the grater) and go to town like you would with a block of cheese.


Keep grating until all the flesh is inside the grater and you're left with just the skin.


Now you can just simply discard the leftover skin, since it won't be used in the dish. With no skin and no seeds you've removed all the components of a tomato that can give a bitter flavor when cooking for extended lengths of time.


Here's the grated flesh of 6 on-the-vine tomatoes in a tupperware container ready to go. Next, chop up the bell peppers and snap the ends of the green beans and take everything but the stock outside (that needs to cook inside, which we'll explain in a bit).


For more of a rustic feel, we used wood instead of standard charcoal, which has a more potent scent and will impart a better smoke flavor. Here we've got the drumsticks cooking over a roaring fire on an oven safe pan.


After the skin starts to get crispy on all sides, spoon in the olive oil, garlic, chopped bell peppers, and green beans.


Give the vegetables a few minutes to soften and infuse with garlic flavor, then add in the grated tomatoes.


Next we're going to throw in the uncooked, seasoned rice. Remember that stock we mentioned earlier? We've had it cooking on the stovetop inside the whole time so it would be boiling.

Because the rice won't cook as long as if you were say cooking on the stovetop or in a rice cooker, we need the stock to be immediately boiling hot to ensure the rice cooks through.

Here we're pouring the hot stock into the pan on the grill. Of course we recommend using homemade stock, but store-bought works as well.


Now close the grill lid and let the rice cook while soaking up the stock for 20 - 25 minutes. The rice should be firm but not hard.


Using some oven mitts and careful maneuvering, we bring the whole pan inside once the rice has finished cooking.
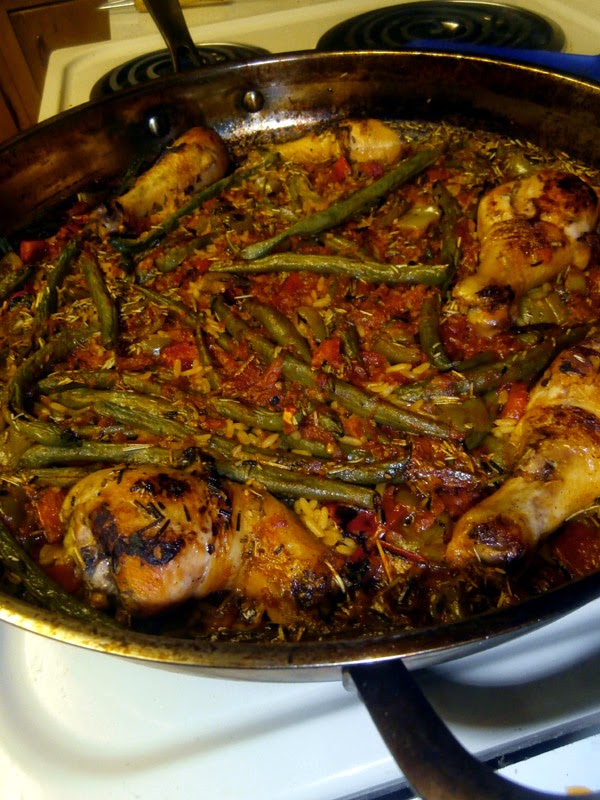

And here's our finished product: an amazingly flavorful drumstick on a bed of rice and vegetables!


Let's dig in!


This was of course just one of many wonderful dishes from Spain, and we're looking forward to trying more in the future.

This one was an astounding success that is really the whole package: hearty, delicious, and with an aroma to die for. Adding in the outdoor grilling element just made it more fun and great way to spend an afternoon with friends and family.

Stay tuned, as the culinary world tour will continue on throughout Europe soon!

Friday, August 29, 2014

Novel Noodles: Oven Roasted Fresh Tomato Sauce

Making a sauce – whether for pasta, BBQ, or just about anything else - is one of the few times where canned ingredients tend to actually be better than fresh.

Diced tomatoes are perfect for reducing down with other ingredients for spaghetti sauces, but this week we wanted to try something different than our traditional marinara sauce. For oven roasted fresh tomato sauce, you'll need:

  • 5 – 6 on the vine tomatoes
  • 2 carrots
  • 1 yellow or white onion
  • 2 Tbsp. Minced garlic
  • Olive oil
  • Salt, Pepper, and Thyme for seasoning


Our normal go-to tomatoes are Roma, both for their flavor and because they tend to be less pricey in our area. On the vine tomatoes have a distinct flavor and smell that are very appealing, however, so we went with that variety instead for this experiment (they are also great for slicing and eating with salt/pepper and cottage cheese). Here I've cored the tomatoes and then sliced them half, setting them in a large baking dish:


Next, peel and chop the carrots, then toss them and the minced garlic in with the halved tomatoes.


Slice the onion into rings, add to the baking dish, and then drizzle everything with a couple of teaspoons of olive oil.


Before throwing in the oven, add some flavor-enhancing and aromatic seasonings, like salt, pepper, and thyme.


You want all the vegetables to get very soft, so pop the dish in an oven set to a high temperature like 425 degrees, and bake for at least 45 minutes.

See how the skin is crackling and raised off the flesh of the tomato when the dish comes out of the oven? That should pull off easily with a fork. Remove and discard the tomato skins, as they will make the sauce more bitter.


Now we're going to pour all the vegetables and any liquid in the pan into a food processor and pulse until it's more of a sauce consistency.

For a little heat, you could add a dash of cayenne or two. If you want to take the flavor a more traditional route, you could also add in a few splashes of balsamic vinegar and a few teaspoons of basil or oregano.


The texture is more chunky than standard tomato sauce, so you'll probably won't to use something like sphaghetti or linguine.


Sprinkle some Parmesan on top and you're good to go!


While this was a fun change of pace, we still love our traditional on-the-stove marinara with canned tomatoes, so we probably won't be switching permanently. If you love the smell and texture of this sauce though, you could try roasting different vegetables for different flavors - from red bell peppers to eggplant and just about anything in between.

Thursday, July 10, 2014

Jayne's Visit Sushi

Several years ago while Megan's sister Jayne was visiting us, we made asparagus and tuna sushi rolls, and we wanted to keep up the tradition when she came to see us again this summer.

Making sushi can be an involved endeavor, but it's less work than you might think and the process itself is half the fun when you've got friends and family dicing and rolling. To get sushi rolls to stick together you've got to make the right kind of rice, which has a much different texture than normal white rice.

For the rice, you'll need:
  • 1 cup sushi rice (found in the Asian section of most supermarkets)
  • 1 sheet kombu or 1/4 cup rice seasoning
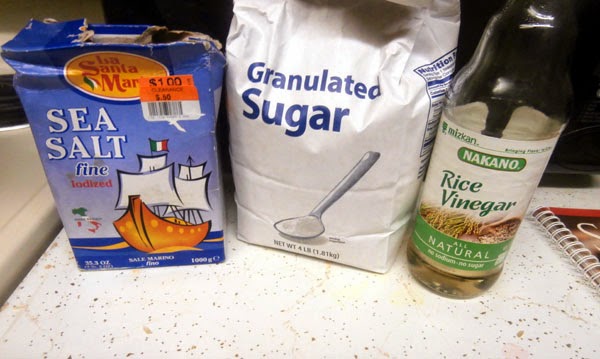
  • 1/3 cup rice vinegar
  • 1 tsp salt
  • 1 tsp sugar
Traditionally you would add flavor to your rice with a kind of dried kelp called kombu, which is very salty and perfect for seasoning rice or being used in making stocks.

It can be quite expensive, however, if you happen to not live in an area near the ocean or with plenty of Asian markets, but you can usually find Japanese rice seasoning - which contains a similar dried seaweed - for a fraction of the cost at any given supermarket.

Cover your rice with water and add in either your sheet of kombu or rice seasoning. Bring to a boil, then cover and reduce heat to simmer until the rice has absorbed all the water - about 30 to 40 minutes.


Don't stir the rice or remove the lid at all during cooking - it needs to remain covered to soak up all the liquid so eventually you'll get fluffy rice like this:


Allow the rice to cool slightly, and then its time to add in the remaining ingredients: salt, sugar, and rice vinegar.


Cut in the ingredients using a wooden spoon rather than vigorously stirring. You may want to pour the rice vinegar over the back of the wooden spoon to ensure an even application.


Set a damp cloth over your rice and let it set until you are ready to start rolling up your sushi.


 For the rolls and filling, you'll need:
  • Nori sheets
  • Sesame seeds
  • 1 cucumber, cut into matchsticks
  • 1 avocado, diced
  • Seafood filling (shrimp, raw sushi grade tuna, imitation crab, a spicy crab mixture, etc.)
Obviously there are dozens of different kinds of sushi filling and a huge range of options. The key is to make sure everything is as fresh as possible, preferably getting the ingredients the day you intend to use them and not freezing anything.


We decided to do three different kinds of filling, one of which is a fun surimi roll that uses imitation crab. To make this filled, combine shredded crab with a few tablespoons of mayo, a couple of dashes sriracha hot sauce, and some store-bought Szechuan sweet and sour sauce. You can also throw in thinly diced cucumber and green onions. Pickled ginger is also frequently an ingredient used here, but we didn't get any this time around.


For the second type of roll we're just going to use leg-style imitation crab with cucumber and avocado.


And finally our third type will use tail-off pre-cooked shrimp along with some of the cucumber.


I prefer reverse-rolls, which have the rice on the outside and the nori sheet on the inside. These are a little trickier to make because of how sticky sushi rice can be.

To make reverse rolls, set a piece of plastic wrap over your rolling mat, and then cover the entire nori sheet in rice. Flip the sheet over so the rice is facing down on the plastic wrap, then add in a thin layer of your preferred filling. Carefully roll the sheet forward and into itself, making sure not to let the plastic wrap get caught up in the rolling - if the plastic wrap goes inside the filling, the rice won't adhere to the sides and your roll will fall apart.

After rolling all the way over, pulling the rolling mat back toward you to reveal your finished roll! Sprinkle on some sesame seeds and slice up the roll into whatever size pieces you prefer.


Here's our all grown up Jayne (21 now!) putting some filling on a nori sheet.


Cristal is busy cutting and plating a recently finished reverse nori roll.


While on our trip to Florida and Kentucky last year, we noticed many places that sold sushi were putting on interesting toppings like spicy sauces, so I decided to try making my own. This is just a homemade, on-the-fly sauce concoction made with mayo, sriracha hot sauce, and sesame seed oil, applied through a thin tipped ketchup bottle.


It had been quite awhile since we'd done sushi, so our rolling and cutting skills were a little rusty, but we got the hang of it eventually 


Here's a plate of three pieces from a reverse roll filled with shrimp, cucumber, and avocado, just topped with sauce.


And now here's some sushi fully plated and ready to go with a smear of wasabi paste and a small saucer of soy sauce for dipping. Sushi is also traditionally served with slices of pickled ginger in-between pieces as a palette cleanser.


Monday, July 7, 2014

Breakfast Chicken Biscuits

Last year you may recall that we did a chicken biscuit breakfast meal trying to replicate something tasty we'd had while eating out.

Since then we've refined that idea a bit and come up with something really amazing that will satisfy your breakfast or dinner cravings, that's actually a bit like a scaled down version of the world-shatteringly awesome Fried Chicken Benedict we made a few years back.

The idea is to use fried chicken, out-of-this-world gravy with an interesting breakfast slant, buttermilk biscuits, and an egg for some extra breakfast goodness.

We want the chicken to be as tender and juicy as possible, so we're both going to use thighs instead of breasts, and we're going to marinate the meat overnight. For the marinade, simply the place the chicken in a shallow dish and pour in a mixture of buttermilk (enough to just cover the chicken), some garlic powder, and a few dashes of hot sauce, such as Tabasco.


For the “Red Eye” gravy you’ll need:

•    ½ cup flour
•    ¼ cup butter
•    ½ - 1 pound pork sausage
•    ½  - 1 cup cup brewed medium to dark roast coffee (use more for a stronger coffee flavor)
•    1 cup milk
•    1 cup heavy cream
•    2 tbsp hot sauce (Tabasco, Frank’s Red Hot, or whatever you prefer!)
•    1 tbsp garlic powder
•    Salt and pepper to taste

This isn't traditional red eye gravy, which usually only consists of grease, brewed coffee, and an add-in like beef bouillon. Instead, we're taking the idea of a coffee-based gravy and simply adding it to a traditional pan gravy recipe.


To start the gravy we need a nice thick base, so first off make a roux by melting and briefly stirring together the flour, butter, and a few teaspoons of milk. When it gets nice and thick (the yellow substance above the meat in the photo below), add in the breakfast sausage and let it begin to cook in the butter and flour.


Once the sausage is browned evenly, pour in your brewed coffee. Start with a small amount like 1/2 - 3/4 cup, because you can always add in more if the coffee taste isn't prevalent enough later.


Next we add in our milk and heavy cream. The mixture of cream and milk makes the end result much creamier and tastier, but if you are wanting to cut out fat just use entirely milk instead.


After about 20 minutes of simmering you'll have an amazing gravy ready to cover our chicken and biscuits!


Speaking of, while that's simmering Megan is putting together the homemade biscuits (also buttermilk of course - we've got a theme going here!) getting ready to go in the oven.


Now as it's all coming together its time to fry the chicken, which only takes a few minutes (about 7 depending on size, but even as little as 5 for small pieces). Here's our marinated chicken:


Before getting fried in a pan of hot oil, they are dredged in a mixture of flour, pepper, garlic powder, onion powder, and paprika. For more flavor, throw in a dash of cayenne or chili powder.


With the frying done, it's finally time to start assembling! Here we've got a biscuit that's been ladled over with a hefty helping of red eye gravy.


Here we've added on a piece of perfectly fried chicken that's crispy on the outside but tender on the inside.


Top it with a fried egg and you've got a hearty, all-in-one meal!