SixSevenEight

SixSevenEight

Wednesday, August 5, 2015

Eating Local: Zucchini and Basil Pasta

Living in a colder climate with a few extra months of winter than the southern parts of the nation, there isn't a big window for a wide range of fresh, locally grown produce in Montana, so you've got to strike the farmer's market while it's available in just a few short months.

From now through the end of the summer, we'll be planning a Saturday meal around whatever interesting local vegetables and meat we can find while walking down to the farmer's market.

This last weekend we came away with the beautiful basil and zucchini pictured below. Not only are they leagues ahead of their store counterparts in terms of flavor, color, and aroma - they are also a better deal. Those zucchini were 4 for $1, and the bunch of basil - about 3 times the amount you'd get in a package at Walmart or Albertsons - was $2.


For our first local-based meal, we're going with a simple one-pan pasta (although because we're silly, we're going to use two pots instead). If you want to give it a shot, you'll need:
  • Two small zucchinis
  • 1 bunch fresh basil
  • 1 handful cherry or grape tomatoes
  • 1 handful button mushrooms + butter for sauteing
  • 4 – 5 cloves garlic
  • 1 white onion
  • 1 box fettuccine or linguine (long noodles work great, but if you prefer shaped pasta, go for it!)
  • 1 tbsp. olive oil
  • Parmesan (preferably block-style for shaving, but pre-grated will do in a pinch)
  • Salt and pepper to taste
We already had onions, mushrooms, and tomatoes on hand, or we would have bought some of those at the market as well!


Nearly everything (except the mushrooms) are all going into one single pot, so to get started we slice and dice all the vegetables.


First we're going to be sauteing the mushrooms separately so they can have a buttery flavor rather than getting mushy boiling in water with all the other ingredients.


Now everything else - the pasta, the oil, the vegetables and about 4 to 4/12 cups water - all go into the pot together at once to cook at the same time. This cuts down on the number of dishes you use and makes pasta meals much simpler, without having to blend and heat a sauce separately.

Everything in one pan gives a great fresh flavor as all the ingredients mingle together.Because of the difference in cooking times and methods, we won't be using our normal homemade pasta, but rather going with standard store bought dried pasta.


This should cook over a high heat so it boils during cooking, allowing the pasta to get al dente and the vegetables to properly heat through.


Be sure to stir with tongs frequently as the water reduces down so everything cooks evenly - you don't want to end up with a few crunchy strands of pasta and some undercooked zucchini. Give it a taste at this point, and you'll probably want to add in some salt. If the flavor isn't quite where you want it, you can also add in some chicken or vegetable stock and let it further reduce.


Once the water has reduced down, just set it aside for about two to three minutes for the remaining liquid to thicken up.

To assemble, spoon over some of the sauteed mushrooms and then add some more diced fresh basil on top as garnish, along with some shaved slices of parmesan and cracked black pepper.


Thanks for checking in on our first look at local-based meals, and be sure to check back in as next week we'll be trying out something very different: kohlrabi!

Friday, July 31, 2015

Spicy Cauliflower

Burgers and ribs are all well can good, but sometimes we like to experiment with much different textures and flavors. Much like Liz Lemon's "I'm a flip flopper," we do our fair share of vegetarian meals in with all the delicious chicken fricassee and grilled paella.

This one was a quite unusual recipe we decided to give a try that's essentially like boneless buffalo wings - only with vegetables instead of meat, and with an agave dipping sauce rather than blue cheese. For this offbeat and non-traditional dinner, you'll need:
  • 3 tbsp. Milk
  • 1/4 cup Flour
  • Garlic Powder 
  • Salt
  • 1/2 Head Cauliflower
  • 2 tbsp. Butter
  • Hot Sauce
  • 1/4 cup Soy Sauce
  • 1/4 Rice Vinegar
  • 1/2 cup Peanut Butter
  • Agave Syrup
  • Lime
  • Whole Ginger Root, grated

To get this started, we're going to pull the cauliflower florets apart and then cut them in half to make them bite sized and more manageable.


In addition to a batter, there will be two sauces to make - a spicy sauce to coat the cauliflower, and a sweet sauce for dipping to cool the burn! If you aren't familiar with that little brown guy next to the lime, that's what fresh ginger root looks like - you can usually find this in any given non-Walmart grocery store with the produce.


The cauliflower is first tossed in a light batter of milk, flour, garlic powder, and salt. There are lots of vegan recipes we've seen that just use water instead - we don't recommend going that route.

You could also go full monty the other direction and use your favorite onion ring / hush puppy / fish fry batter and fry these rather than bake them, but that sort of defeats the purpose of using healthy cauliflower in the first place. It's all about balance here!

For a fun variation, you could also pop in Parmesan cheese at this point for a flavorful crunch when the cauliflower is done baking, and then just skip the spicy sauce.


After being lightly battered we're going to put these on a baking sheet and pop them in a 450 oven for about 8 - 10 minutes.


Now its time to make the sauce. You can take this any flavor you want just by swapping out the base ingredients here. We went with butter, soy sauce, rice vinegar, and hot sauce. If you couldn't tell from the picture below, we put waaaaaaaaaaaaaaaay too much hot sauce and ended up with something super spicy! Instead of buffalo, you could do BBQ sauce, teriyaki, or anything that sounds good to your palette.


The sauce gets whisked up and then reduced down over a low boil while the cauliflower bakes in the oven.


After starting to get golden brown, we pull these piping hot veggies out of the oven to get coated in sauce.


After being tossed in the buffalo sauce, return the cauliflower to the oven for another 2 - 3 minutes to finish cooking.


If you wanted to, you could totally dip these in any given ranch, blue cheese, or yogurt-based sauce (and we recommend you do!) but we went a bit weird and tried something different. Here Megan is mixing together peanut butter with rice vinegar, a dash of soy sauce, grated ginger, fresh squeezed lime, and agave syrup. The result is more Indian inspired and a much different experience than you'd typically have with buffalo wings.


Now it's time to serve up - toss some cauliflower bites on a plate with a side of dipping sauce and you've got either a vegetarian friendly finger food for a party, or a fun weeknight meal for a real change of pace!


Thursday, May 21, 2015

Homemade Crumbling Cheese and Street Tacos

Our cheese making adventures have continued steadily since first whipping up a batch of delicious, creamy ricotta last month. Having mastered ricotta and even making some amazing mascarpone, we next tried out a personal favorite: queso blanco.

We've been buying this crumbling cheese for years to use in our pulled pork nachos and other Mexican dishes, so it only made sense to make some at home. Although there are more steps in this process than from ricotta or mascarpone, there's actually less ingredients. All you need here is one gallon of whole milk, 2 tsp. of citric acid, and another tsp. of salt.

If you want to throw in extra herbs or seasonings, cilantro is a good option. Below you can see we're also using a thin sieve and some cheese cloth.


To start this we're cooking the milk slowly to 195 degrees. As soon as it hits the proper temp, we pull it off the heat and add in the citric acid, which will make the curds form.


The milk and citric acid is covered and left to sit for a full five five minutes, until the curds and whey separate. Here we're pouring the curds into the sieve and cheese cloth, with a bowl underneath to catch the whey.


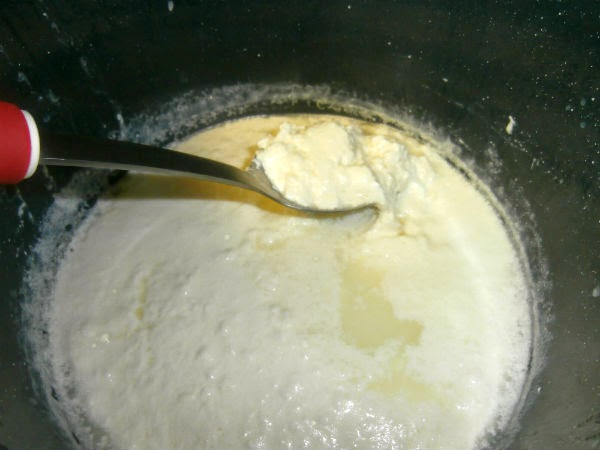
After draining for a few minutes, here's our cheese, which will be tasty but isn't yet in the right shape and consistency.


To get it where we want it (and ensure we get that awesome crumbly texture), we wrap the curds tightly in cheese cloth and form it into a wheel shape.


We need to put some constant pressure on the cheese for about an hour. Since I don't fancy standing there pushing down for 60 minutes, I've filled the empty milk jug about 3/4 up with water and am using two plates to squeeze the cheese. This will remove any excess liquid and give us the texture we want.


After an hour the cloth is removed and we've got a wheel just like the "queso fresco" branded cheese you'd get at the supermarket with the exact same flavor and ability to easily crumble. Here's we've crumbled up half the wheel to use for street style tacos and corn on the cob!


This will be a combination of indoor and outdoor cooking, with the corn to be grilled outside, while the taco meat will be pulled pork. We'll make that in the crock pot just like with our game day pulled pork nachos, but we'll use taco seasonings instead of our usual rub.

Mexican street corn is a whole different beast from traditional corn on the cob, as its served slathered in sauce and rolled in cheese. Here Megan has whipped up a sauce of mayo, chili powder, garlic powder, lime juice, and pepper. Feel free to improvise here - throw in any seasonings that strike your fancy!


Here's our cooked corn, pulled fresh off the grill and ready to be taken to the next level.


First Megan is brushing them with the sauce, which will let the cheese adhere to the sides.


Now its rolled in our awesome homemade cheese and ready to be mesilly (and make not mistake - this is messy) devoured.


Here's our corn with the "street" style tacos - a layer of homemade guacamole, some tender and juicy pulled pork, diced tomato, cilantro, a whole mess of crumbly cheese, and a squirt of fresh lime.


Tuesday, April 7, 2015

Cheesemaking: Ricotta!

When it comes to cooking, by and large, making everything at home is always going to be superior to buying at the store. While it takes more work, the flavor can't be beat. From making our own pasta to bbq sauces and guacamole, we've found the extra work is always well worth it when you taste the end result.

Until now we've never tried cheesemaking, but this last week we finally rectified that situation, starting out by making a delicious creamy ricotta right on our stove at home.

To make ricotta you'll need a very large pan - ideally stainless steel but anything that doesn't have a teflon style coating will work - and the following ingredients:
  • 1 gallon whole milk
  • ½ cup heavy whipping cream
  • 2 tsp non-iodized salt
  • 1 tsp citric acid
We use powdered citric acid specifically for cooking, but if you don't want to go hunting for that, you can instead get acid from another source, such as wine vinegar.

Unlike most other recipes, cheese making is an instance where you can't swap out ingredients and still get the same result. Make sure NOT to use ultra-pasteurized milk or iodized salt, as  these can both prevent the curds from forming and you'll just get burned milk instead of cheese.


Mix all the ingredients together and very slowly raise the temperature to 184 degrees Fahrenheit - this is where an instant read digital food thermometer comes in very handy! We turned our stove to the "4" setting and it took about an hour and 45 minutes to hit the right temperature.


Eventually curds will start to form in a layer on the top of the milk. Every now and again be sure to use a rubber spatula to scrape the bottom or you'll get burned cheese. It won't seem like enough curds are forming at first when you finally get up to temperature, but don't worry, you're on the right track!


As soon as you hit 184, remove the pan from the heat, cover with a lid, and let it sit 15 minutes to allow the curds to finish forming. Here's our first batch after the cooling process has finished as we're pulling the curds off the whey.


It's looking good already, but it's not quite done yet, as you still need to strain the cheese.


Here we're using a fine mesh sieve to let the remainder of the liquid whey drain out. Originally we used cheese cloth over the sieve, but we found it wasn't really helping and the cheese just stuck to the cloth, so eventually we went with the sieve alone. After the drip dry finishes, this is the time to taste test - if you want, you can fold in either extra salt for more flavor, or extra cream if the ricotta is too thick.


To serve our ricotta we're using baked bread and some garlic cloves. Here we've chopped the top off a few garlic cloves, covered with olive oil, sea salt, and pepper, and wrapped in tin foil. Cook the garlic packet in the oven at 400 degrees for about 35 - 40 minutes.


Squeeze the garlic out of the cloves into a small container and mash them up with olive oil and balsamic vinegar. Add in a dash of pepper for an amazing dipping sauce!


Here's our finished ricotta - topped with some extra olive oil - served with baguette slices and some spinach and mushroom artisan bread we found at the local grocery store.


You can top any of the bread with the cheese, or just straight up eat it with a drizzle of olive oil and pepper. Ours was significantly more creamy and flavorful than the ricotta you'll find at the grocery store, and it was amazingly worth all the extra effort!


Wednesday, March 18, 2015

Culinary World Tour: Elana Ruz Cuban Sandwiches With Fried Plantains

The world tour finally continues! This time around we decided not to keep going in order but took a detour to head down to Cuba. Before heading into the specifics, be sure to check out our previous stops on the culinary world tour:

Spain: Grilled Paella
England: Yorkshire Pudding
Ireland: Shepherd's Pie
Iceland: Lamb Pie With Rye Crust
Greenland: Suaasat
Canada: Poutine
Mexico: Posole

For the Cuban stop we decided to go with iconic fried plantains and a twist on the classic cubano sandwich: the Elena Ruz.

Rather than picking up bread at the bakery, we went the route of making our own, and let met ell you, this was an aaaaaaaaaaaaaaaaaaaaal day experience.

First we heat up the yeast with water and sugar so it will activate properly.


We're also going to need four beaten eggs to add in shortly.


While the yeast is heating, we'll get our dry ingredients together, using both regular white flour and bread flour.


Once the yeast has puffed up, we're adding in a mixture of beaten eggs and honey.


The yeast mixture is then combined into the dry ingredients in small batches - about 1/5 of the mixture at a time, which is whisked together until incorporated.


Now the real work begins: its time to knead the dough until elastic - 20 solid minutes by hand! This is more difficult than you'd think, and its times like these we wish we had a heavy duty Kitchenaid mixer!


Now its time to play the first waiting game. Oil up the bottom side of plastic wrap to cover the dough in a large pan, and then refrigerate for four hours.


Next we pull the chilled dough out of the fridge and let it rise for two hours.


Now we punch it down and let it rise yet again. We're starting to think we should have done this earlier in the morning!


After all the rising is finally done, we roll out the dough and shape it into small rectangles for the sandwiches.


Here Megan is brushing the shaped dough with melted butter.


15 minutes in the oven, and we've got these amazing looking (and smelling!) sandwich rolls that perfectly pull apart!


We're not done cooking yet though. Now it's time to assemble the sandwiches. For an Elana Ruz Cuban, we're using thick turkey, cream cheese, and strawberry preserves.


Once it's all assembled, we top it with melted butter again and cook it on the skillet - but to make it a true Cuban, be sure to place a heavy cast iron skillet on top to press it down and cook the top.


Don't forget about our side - fried plantains! If you haven't had these before, don't try eating them straight up: they're gross! But when you cook 'em up proper, they become a thing of beauty.


After the insane peeling process (trust me, a knife is required), we pull off thin strips of plantain by using a vegetable peeler. We're going to fry them up in a skillet with about a half inch of hot oil.


Toss a little salt on your fried plantains and it's time to dig in!