SixSevenEight

SixSevenEight

Thursday, July 10, 2014

Jayne's Visit Sushi

Several years ago while Megan's sister Jayne was visiting us, we made asparagus and tuna sushi rolls, and we wanted to keep up the tradition when she came to see us again this summer.

Making sushi can be an involved endeavor, but it's less work than you might think and the process itself is half the fun when you've got friends and family dicing and rolling. To get sushi rolls to stick together you've got to make the right kind of rice, which has a much different texture than normal white rice.

For the rice, you'll need:
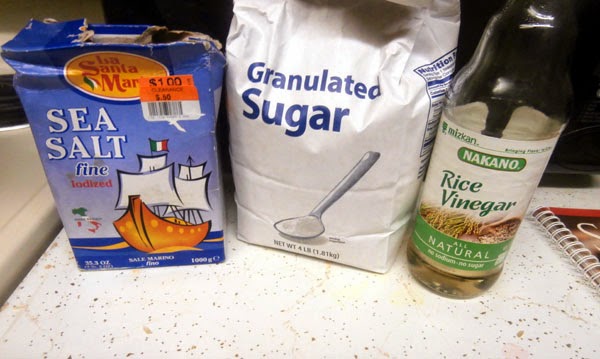
  • 1 cup sushi rice (found in the Asian section of most supermarkets)
  • 1 sheet kombu or 1/4 cup rice seasoning
  • 1/3 cup rice vinegar
  • 1 tsp salt
  • 1 tsp sugar
Traditionally you would add flavor to your rice with a kind of dried kelp called kombu, which is very salty and perfect for seasoning rice or being used in making stocks.

It can be quite expensive, however, if you happen to not live in an area near the ocean or with plenty of Asian markets, but you can usually find Japanese rice seasoning - which contains a similar dried seaweed - for a fraction of the cost at any given supermarket.

Cover your rice with water and add in either your sheet of kombu or rice seasoning. Bring to a boil, then cover and reduce heat to simmer until the rice has absorbed all the water - about 30 to 40 minutes.


Don't stir the rice or remove the lid at all during cooking - it needs to remain covered to soak up all the liquid so eventually you'll get fluffy rice like this:


Allow the rice to cool slightly, and then its time to add in the remaining ingredients: salt, sugar, and rice vinegar.


Cut in the ingredients using a wooden spoon rather than vigorously stirring. You may want to pour the rice vinegar over the back of the wooden spoon to ensure an even application.


Set a damp cloth over your rice and let it set until you are ready to start rolling up your sushi.


 For the rolls and filling, you'll need:
  • Nori sheets
  • Sesame seeds
  • 1 cucumber, cut into matchsticks
  • 1 avocado, diced
  • Seafood filling (shrimp, raw sushi grade tuna, imitation crab, a spicy crab mixture, etc.)
Obviously there are dozens of different kinds of sushi filling and a huge range of options. The key is to make sure everything is as fresh as possible, preferably getting the ingredients the day you intend to use them and not freezing anything.


We decided to do three different kinds of filling, one of which is a fun surimi roll that uses imitation crab. To make this filled, combine shredded crab with a few tablespoons of mayo, a couple of dashes sriracha hot sauce, and some store-bought Szechuan sweet and sour sauce. You can also throw in thinly diced cucumber and green onions. Pickled ginger is also frequently an ingredient used here, but we didn't get any this time around.


For the second type of roll we're just going to use leg-style imitation crab with cucumber and avocado.


And finally our third type will use tail-off pre-cooked shrimp along with some of the cucumber.


I prefer reverse-rolls, which have the rice on the outside and the nori sheet on the inside. These are a little trickier to make because of how sticky sushi rice can be.

To make reverse rolls, set a piece of plastic wrap over your rolling mat, and then cover the entire nori sheet in rice. Flip the sheet over so the rice is facing down on the plastic wrap, then add in a thin layer of your preferred filling. Carefully roll the sheet forward and into itself, making sure not to let the plastic wrap get caught up in the rolling - if the plastic wrap goes inside the filling, the rice won't adhere to the sides and your roll will fall apart.

After rolling all the way over, pulling the rolling mat back toward you to reveal your finished roll! Sprinkle on some sesame seeds and slice up the roll into whatever size pieces you prefer.


Here's our all grown up Jayne (21 now!) putting some filling on a nori sheet.


Cristal is busy cutting and plating a recently finished reverse nori roll.


While on our trip to Florida and Kentucky last year, we noticed many places that sold sushi were putting on interesting toppings like spicy sauces, so I decided to try making my own. This is just a homemade, on-the-fly sauce concoction made with mayo, sriracha hot sauce, and sesame seed oil, applied through a thin tipped ketchup bottle.


It had been quite awhile since we'd done sushi, so our rolling and cutting skills were a little rusty, but we got the hang of it eventually 


Here's a plate of three pieces from a reverse roll filled with shrimp, cucumber, and avocado, just topped with sauce.


And now here's some sushi fully plated and ready to go with a smear of wasabi paste and a small saucer of soy sauce for dipping. Sushi is also traditionally served with slices of pickled ginger in-between pieces as a palette cleanser.


Monday, July 7, 2014

Breakfast Chicken Biscuits

Last year you may recall that we did a chicken biscuit breakfast meal trying to replicate something tasty we'd had while eating out.

Since then we've refined that idea a bit and come up with something really amazing that will satisfy your breakfast or dinner cravings, that's actually a bit like a scaled down version of the world-shatteringly awesome Fried Chicken Benedict we made a few years back.

The idea is to use fried chicken, out-of-this-world gravy with an interesting breakfast slant, buttermilk biscuits, and an egg for some extra breakfast goodness.

We want the chicken to be as tender and juicy as possible, so we're both going to use thighs instead of breasts, and we're going to marinate the meat overnight. For the marinade, simply the place the chicken in a shallow dish and pour in a mixture of buttermilk (enough to just cover the chicken), some garlic powder, and a few dashes of hot sauce, such as Tabasco.


For the “Red Eye” gravy you’ll need:

•    ½ cup flour
•    ¼ cup butter
•    ½ - 1 pound pork sausage
•    ½  - 1 cup cup brewed medium to dark roast coffee (use more for a stronger coffee flavor)
•    1 cup milk
•    1 cup heavy cream
•    2 tbsp hot sauce (Tabasco, Frank’s Red Hot, or whatever you prefer!)
•    1 tbsp garlic powder
•    Salt and pepper to taste

This isn't traditional red eye gravy, which usually only consists of grease, brewed coffee, and an add-in like beef bouillon. Instead, we're taking the idea of a coffee-based gravy and simply adding it to a traditional pan gravy recipe.


To start the gravy we need a nice thick base, so first off make a roux by melting and briefly stirring together the flour, butter, and a few teaspoons of milk. When it gets nice and thick (the yellow substance above the meat in the photo below), add in the breakfast sausage and let it begin to cook in the butter and flour.


Once the sausage is browned evenly, pour in your brewed coffee. Start with a small amount like 1/2 - 3/4 cup, because you can always add in more if the coffee taste isn't prevalent enough later.


Next we add in our milk and heavy cream. The mixture of cream and milk makes the end result much creamier and tastier, but if you are wanting to cut out fat just use entirely milk instead.


After about 20 minutes of simmering you'll have an amazing gravy ready to cover our chicken and biscuits!


Speaking of, while that's simmering Megan is putting together the homemade biscuits (also buttermilk of course - we've got a theme going here!) getting ready to go in the oven.


Now as it's all coming together its time to fry the chicken, which only takes a few minutes (about 7 depending on size, but even as little as 5 for small pieces). Here's our marinated chicken:


Before getting fried in a pan of hot oil, they are dredged in a mixture of flour, pepper, garlic powder, onion powder, and paprika. For more flavor, throw in a dash of cayenne or chili powder.


With the frying done, it's finally time to start assembling! Here we've got a biscuit that's been ladled over with a hefty helping of red eye gravy.


Here we've added on a piece of perfectly fried chicken that's crispy on the outside but tender on the inside.


Top it with a fried egg and you've got a hearty, all-in-one meal!


Wednesday, May 28, 2014

Novel Noodles: Gorgonzola "Alfredo"

One of the reasons Megan and I are together today is because of fettuccine alfredo: but even a classic like that timeless dish can be updated from time to time.

Putting a different spin on the idea of a cream-based pasta sauce, we took some of the basics of alfredo (heavy cream and Parmesan), but go for a very different flavor by using Gorgonzola and fresh sage. The Gorgonzola offers a tangy bite, while the fresh sage gives a savory flavor that balances everything out.

 For this dish, you'll need:

  • Bowtie or Penne Pasta
  • 1 cup heavy whipping cream
  • 1 bunch fresh sage (do NOT use dried for this recipe - the taste and smell don't work the same way!)
  • 1 six oz. container Gorgonzola
  • ¼ cup Parmesan
  • Ground pepper

Get your pasta cooking in a pot of boiling water, and then start putting together the sauce by heating the cream with the Gorgonzola and Parmesan. Toss in a few pinches of fresh cracked black pepper and stir frequently.


For a side, we're doing a simple but tasty take on garlic French bread. Here we've just taken regular old hamburger buns, slathered them in butter and garlic salt, and topped them with shredded cheese. Throw 'em in a 375 degree oven for about 5 minutes and you've got perfectly sized portions ready to pick up and eat.


When the pasta is cooked, drain the water and throw the bowties in with the sauce. Dice up your fresh sage and toss it in, then give it all a few good stirs and serve immediately.


For a prettier plate, throw a few extra whole pieces of sage leaf on top as a garnish!


Here's the finished dinner, all coming together in about 15 minutes. Quick and tasty!


To change up this dish, add in fresh minced garlic in the sauce, or swap out the cheese with any other non-standard cheese that has a flavor you think will pair well with fresh sage.

Monday, May 12, 2014

Easter 2014: Artichoke Stuffed Chicken Breast

All the major holidays are fantastic excuses to try out some new recipe or whip up something fantastic to eat for family and friends - and Easter is no exception!

Although we don't recognize either the original Pagan Eostre (from which the rabbits and eggs come) or the more modern Christian Easter involving the theme of resurrection, that doesn't stop us from getting in the spirit of the holiday with our own twist. There's of course a big meal, followed by a zombie movie marathon! What started as a joke has become an honored family tradition that we wouldn't miss any year.

Moving on from last year's bacon-wrapped pork loin injected with honey mustard sauce or previous Easter's where we've done essentially an extra Thanksgiving meal with chicken instead of turkey, for 2014 we threw together stuffed chicken breasts. For artichoke stuffed, bacon wrapped chicken breasts you will need:
  • 1 chicken breast per person
  • 1 – 2 strips bacon per chicken breast
  • 1 bunch spinach (or about half a bag if you don't get fresh loose spinach)
  • 1 container Ricotta cheese
  • 1 12 oz. jar or can artichoke hearts
  • ¼ cup Parmesan cheese
  • ¼ cup mozzarella cheese
  • Seasonings to taste
Let's get Easter dinner started! First up Megan cooks the spinach on a skillet until it begins to wilt, pulling it off before it looses too much moisture.


The spinach is then roughly chopped and mixed with the ricotta, parmesan, and mozzarella. Next drain and dice the artichoke hearts and add them to the mixture. Sprinkle in whatever seasonings you'd like - salt and pepper are a good place to start, and if you want something extra garlic powder is always a great option.


Cut a slit into one side of each chicken breast and then slowly cut in deeper until you have a large pocket - but be careful not to accidentally cut all the way through or you'll end up with chicken sandwiches instead of stuffed chicken breasts! Stuff a few heaping spoonfuls of the mixture into the pocket.


After stuffing each breast, wrap one or two pieces of bacon around it to keep the chicken closed (not mention add some great extra flavor!).


Here we've got all our chicken breasts stuffed, wrapped, and sprinkled with some extra cracked black pepper. There is a ton of flavor in the stuffing, but if you feel like going crazy you could also brush on a sauce or glaze at this point.


What about the sides? With how huge and decadent the main course is, we decided to go minimalist and healthy: chopped fresh broccoli and cauliflower lightly seasoned and baked in the oven.


Here's one stuffed breast fresh from the oven after cooking for about an hour at 325, served up with a side of veggies and rice.


There are plenty of ways to modify this recipe, from injecting a beer or sauce directly into the meat to changing out the filling ingredients to glazing the top of the chicken with a flavored mustard.


For desert, we had some amazing cream filled cookies! These "double-decker" cookies start with a single layer...


...that then gets topped with homemade cream filled and topped with a second cookie!


We'll be covering how to make these in detail - along with several other yummy deserts - in an upcoming post, so stay tuned!

Monday, April 28, 2014

First Grill of 2014

It happens every year - we always try to grill earlier than we really should, but when there's a random warm and less windy day, we jump on the opportunity to throw in an early grilling session - even if it ends up snowing a day or two later!

This year we finally had to cave in and get a new grill, as the old was rusted up and getting pretty gross after three years of freezing and thawing out in the shed. We've managed to luck out twice in a row now with grills and get the last display model pre-built and at a discount. Here's our new beauty with the charcoals heating up in the chimney starter:


Last year we kicked off the season by grilling up chicken sausage sandwiches and making homemade red pepper relish. Continuing in that tradition, we decided to make chicken burgers to kick off grilling season '14! These are made by mixing together one pound of ground chicken with whatever burger seasonings strike your fancy - onion and garlic powder, Worcestershire sauce, and parsley are all good places to start. We've also go some sliced onions and both green and red bell pepper that will be hitting the grill.


Now that it's all on the grill, Megan snapped a shot of Cristal and I sitting back and enjoying the weather.


The first sacrifices to the grilling gods were made as we turned over the vegetables. We forgot to put on the vegetable screen, so we lost a couple, but most of them made it out OK!


What's that delicious molten goodness oozing out of that burger at the back? That's Swiss cheese! When we put together our patties, we split the meat into two parts, lay down a slice of cheese, and then form them together so the cheese is on the inside.


Here we're putting together a burger with a side of baked fries. We didn't quite plan ahead enough on this first session to also grill the side, but we're planning on making some great potato and vegetable sides on the grill throughout the coming summer.


Here's a shot of the inside, which explodes with cheesy goodness!


For more outdoor cooking ideas, be sure to check out the recap of our 2012 grilling season with links to all the amazing ribs, burgers, pizzas, and more that were made that year.