SixSevenEight

SixSevenEight

Wednesday, September 26, 2012

The Insaniwhich 2.0

Way back in 2010 when the "Man Vs. Food" show was still on our regular viewing rotation I put together an insane sandwich which consisted of a seasoned chicken breast, bacon, popcorn shrimp, macaroni and cheese, and buffalo wing sauce. Earlier this year that sandwich was tweaked to become the "Insaniwhich," featuring chicken directly injected with wing sauce and fried clams instead of shrimp.

While this sandwich is amazingly awesome, it's also quite unhealthy, and Megan doesn't care for seafood, which limited its appeal for her. Now it's time for the "Insaniwhich 2.0" - a revamped version of this sandwich that changes up the meat and swaps out the seafood for homemade pico de gallo.


For the pico de gallo, I diced white onion, tomato, and poblano peppers, which were then seasoned with garlic powder. I simply used what was on hand and got a great result, but if you are planning ahead you may want to add in fresh cilantro and a few squeezes of lime.


We had some pork chops in the fridge that needed to be used, so the sandwich officially switched from chicken to pork. 


While unfortunately we were out of bacon, there still needed to be a good-but-bad-for-you element, which meant it was time to start frying! Frying means we needed a breading, so I whipped up a mixture of flour, red pepper flakes, chili powder, garlic powder, onion powder, and pepper.


The pork chops are coated, dipped into a bowl of milk, and then coated again to ensure the meat is covered evenly and that the breading is going to stick and not float off during the frying process.


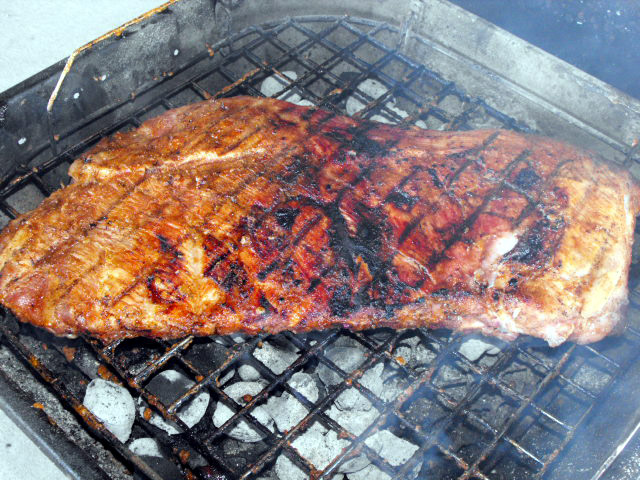
A pan of vegetable oil is brought to a medium high temperature and then we carefully dipped the breaded pork in and cooked for about eight to ten minutes.


Here's the golden brown awesomeness of a fried pork chop, which makes a great sandwich filling regardless of whether you want to add an insane bevy of toppings.


The pork chops were too big to successfully fit as-is on buns, so we cut ours in half. Here I've thrown on some wing sauce, but anything from mayo and ketchup to ranch dressing would do here.


Next up is the pico de gallo and some monteray jack cheese, or whichever sliced/shredded cheese strikes your fancy.


Remember the peach mustard BBQ sauce we made for the ribs in the last blog?  We had a good deal left over and decided to try it out here - and it was a delicious addition!


This sandwiches' claim to fame was always the macaroni and cheese, which remained the star in this version! The sandwich is still great without it too, by the way, if you'd like something a little less messy with fewer ingredients.


The finished sandwich is essentially a meal unto itself, especially when all those delicious toppings start falling off and turn into their own side dish!


Monday, September 24, 2012

Grilling Season '12: Peach Mustard Pork Ribs

Back in August when the prime grilling days were beginning to dwindle we decided we had to try a few off-the-beaten-path variations on our ribs, which were already turning out great with our custom BBQ sauces and rubs. On the Six Seven Eight Facebook page we asked our readers to vote on which non-traditional sauce to make, and the overwhelming majority asked for a coffee BBQ sauce and rub. After that experiment turned out exceedingly well we still had one more interesting twist to try out - a peach mustard BBQ sauce.

Unlike the other sauces we've covered here, this one doesn't require hours of reducing to thicken up, so it's a snap to make in a hurry. The ingredients include djion mustard (we used two different kinds, picture below), spicy brown mustard, apple cider vinegar, peach jam, and onion and garlic diced very small.


You don't want to bite into something crunchy with BBQ sauce, so first the onion and garlic are cooked with butter in a sauce pan until they are softened and incredibly fragrant.


The rest of the ingredients are whisked together and then poured into the cooking garlic/onion/butter mixture.


After mixing everything up we arrived at this sauce that combines sweet and savory flavors. It's essentially done once it's heated up, but we continued to cooking for about a half hour to further develop the flavor. After cooking this can be stored in the fridge until needed.


Here's our rack of pork spareribs that have been washed, trimmed, and set on plastic wrap to contain the mess that's about to happen between the rub and the sauce.


For these ribs we went with a brown sugar based rub to work with the sauce. If you want to see a more in-depth look at how to put together a rub, check out previous blogs for cherry spareribs or root beer baby back ribs.


The rub is poured liberally on both sides of the ribs and then gently massaged in until all the meat and bone surfaces are covered.


We won't just be doing a rub though, as with the different consistency of this sauce we wanted to try using it as a sort of marinade for tenderizing the meat.


After spooning out a line of the sauce, I went about the messy business of working all those delicious flavors into the meat.


Once rubbed and sauced up, the ribs are tightly packed up in plastic wrap and refrigerated for a few hours.


Since we've done a variety of blogs on ribs before, this time I'll pass over explaining how we set up our charcoal. Here we're starting out by cooking over direct heat briefly to get the grill marks.


After we have the desired level of smoky char, a piece of tinfoil is slid underneath the ribs so the meat can slow cook for about two hours.


During the cooking process, the ribs are rotated and turned, and we brush on more of the peach mustard sauce.


At the end of the cooking time we've got fall-off-the-bone ribs that became this amazing shade of red and had a fantastic smell from the peach mustard combo.


As usual, we're having a  salad with our ribs, and a salad needs to be properly jazzed up - here's our fruit and veggies that will be topping the side.


While the salad is getting put together I'm cutting apart the ribs into individual portions for everybody eagerly waiting around the table.


Here's the ribs from a few different angles so you can see the smoky outer layer and the succulent, juicy meat.


Along with our salad we also had homemade potatoes au gratin, which will be covered in-depth during it's own blog segment later on.


This was our last major grilling event of the summer '12 season, although we will still have another blog coming down the line covering some of the smaller meals we made during backyard BBQ sessions. As summer gives way to fall we'll be shifting our focus soon onto making a variety of interesting pasta sauces and bean dishes, as well as returning to our culinary world tour with the next stop: Iceland!

Wednesday, September 19, 2012

Smoky Jalapeno Ranch Dressing

After previously mixing together a homemade Thousand Island dressing, Megan and I both decided we should try making a variety of different salad dressings, taking inspiration from our favorite store bought or restaurant versions. In the Greenland stop of our culinary world tour, we mentioned using smoky jalapeno ranch, which is our latest dressing concoction. Our base ingredients are mayo, sour cream, and buttermilk. If you want something more along the lines of a dip instead of a dressing, omit the buttermilk.


First all the base ingredients are mixed together thoroughly with a whisk until the mixture is smooth.


Next goes in the green seasonings for flavor and extra color: chives, dill, and parsley.


Those are followed up by the other seasonings: garlic powder, garlic salt, onion powder, and black pepper.


The "smoky" element in our case came from a few tablespoons of liquid smoke, but you could instead go an even spicier route and have the "smoky" aspect come from chipotles in adobo sauce. We've covered those spicy canned chilis in several blogs before, including our pepper comparison guide here.


Finishing off the dressing are diced jalapenos for a nice spicy kick. We used jarred jalapenos instead of fresh, as they are softer and pack a bit more flavor. If you want a crunchy element, instead use fresh jalapenos.


Here I'm spooning the finished dressing onto a salad served along with some leftover pasta casserole from the night before.


That huge bowl of ranch wasn't going to get used up in one meal, and we enjoyed this awesome salad topper  on quite a few lunches and dinners. Here we've put together salads and cookies for a picnic, with some of the dressing in a separate container.


By pouring the dressing on the pre-mixed salads at the picnic, instead of ahead of time, you prevent the lettuce and veggies from getting soggy during transportation time.


Next in our exploration of dressing will be gorgonzola vinaigrette, and we also have a few more grilling blogs coming up to cover those chicken, pork, and beef BBQ meals we didn't get to over the course of the summer.

Tuesday, September 18, 2012

Spicy Buffalo Chicken Calzones

The buffalo wing sauce we started making a few weeks back has turned out great, and we've since experimented using different base hot sauces and differing amounts of ingredients. One thing that came to mind was a thicker and creamier version of wing sauce we had served with calzones at a restaurant once, so more experimentation was in order to try to replicate it. For our calzones, we started out by slicing up one inch strips of chicken breast.


To get the thicker consistency, which is almost like a dip, we made the sauce almost the same way as in our previous blog, but used extra ketchup and heated it up with about half a container of sour cream. After simmering for 45 minutes we got this brightly colored end product that was a perfect balance between dip and sauce.  Unfortunately we made it far too spicy using a different base hot sauce, so it needed to be diluted down with something else before going in our calzones.


To cut down on the heat and make a filling for our calzones we cooked the wing sauce with the chicken strips and a package of cream cheese.


Everything is mixed together in the crock pot and then put on low heat for several hours.


At the end we had a no-fuss filling ready to go that didn't take much effort at all.


For the calzone dough any pizza crust recipe will do. We like to use this one because it gets a little crunchy on the outside while still being fluffy on the inside.


The filling is first spooned out out over half of the calzone dough...


...and then the other half is folded over to create the crescent calzone shape.


After baking for about 15 minutes we've got two finished piping hot calzones fresh from the oven.


It's an oozing molten volcano of wing sauce, cream cheese, and chicken in there!


Our calzones were pretty basic as we were trying something new and quick, but there's a lot of variations that could be done here. If you don't want to go the crock pot route, instead cook the chicken strips with some veggies (green bell pepper and onion would be great!) on the stove for a few minutes and then spoon the filling with the sauce onto the calzone dough. If you want a fun pizza style night, use any leftover dough to make bread or cheese sticks along with the calzones.