SixSevenEight

SixSevenEight

Tuesday, July 31, 2012

Grilling Pizza

Ribs, chicken, burgers, kebabs: we've made all these classic favorites on the grill, but barbecuing doesn't have to stick just to the basics. An outdoor charcoal grill can cook just about anything if you're willing to re-think how you cook certain items.  To try out something new with our grill, we decided to cook pizzas outside, since it's been far too hot for using the oven lately.

Cooking a pizza on the grill completely changes the flavor and texture, since you're getting that fantastic smoky edge, and the bottom crust is likely going to end up with a little bit of char. For our first attempt we decided to forgo our usual process of making the dough, and instead got a pre-made cheese pizza on clearance at Smiths for $3.49, along with a bag of pre-shredded cheese for $1.49.


Of course just the standard cheese topping won't do, so here Megan is sprinkling on the Mexican shredded cheese.


Cheese alone makes for a pretty boring pizza, and we wanted to see how the charcoal heat would affect different toppings, so we also put on sliced tomato, mushroom, green onion, and pancetta (a thinly sliced pork product similar to bacon that's usually available in the specialty cheese section of the grocery store).


As usual, we're going with indirect heat for our pizza. Unlike with a lot of other meats, it's pretty much mandatory here if you want to avoid burning the crust. Below you can see me pouring the burning coals out of our charcoal starter. The easiest way to do indirect heat with a pizza is to push all the coals onto one side, and have one half of the pizza over the coals, then turn the pizza a quarter turn every five or so minutes. As the cooking progresses and the crust browns, pull the pizza completely away from the coals to the other side of the grill so it doesn't burn.


You will definitely want to lay down a layer of tin foil before setting down the pizza. Putting tin foil underneath the pizza serves three main purposes. First, it makes it much simpler to rotate the pizza, since you only have to grab a corner of the foil and just turn the whole thing. Second, it provides structural support and prevents the dough from sagging into the coals, which can be a problem if you are making your own dough. Finally, and most importantly, it helps to prevent the crust from burning since, unlike with ribs or burgers, you aren't able to flip the pizza over part way through the cooking process.


The bottom layer of crust will cook through much more quickly than thick cut veggies, and it will take awhile for the cheese to bubble and turn the right color, so make sure to watch it carefully and turn as necessary.


The finished pizza looks fantastic, smells heavenly, and has a flavor you simply can't get by cooking with the oven.


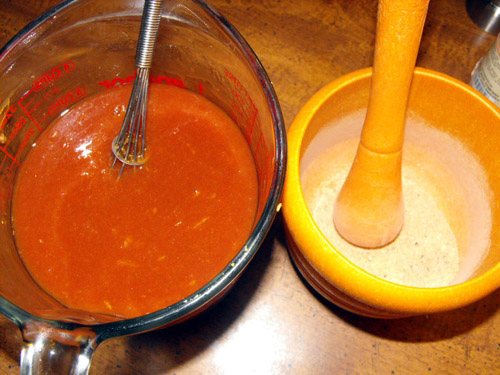
After our first experiment, we later had a pizza grilling night with friends and family over where everyone made their own custom pizza. We made a huge ball of dough and cut up all the toppings, then set it all outside on a folding table next to the grill, along with a bowl of sauce and a plate of shredded cheese. Everyone put together a custom pie by rolling out their own dough and adding whatever toppings they wanted: onion, bell peppers, mushrooms, bacon, cheddar and mozzarella, jalapenos, green onions, tomatoes, and more.

Here are a few of the finished pizzas, with all their unique shapes and topping combinations. Using a slightly sweet homemade pizza sauce made with balsamic vinegar and a hint of sugar creates a great flavor combination with the smokiness added in from the charcoal cooking.


There will be even more outdoor barbecue adventures coming in these last few weeks left of the 2012 grilling season, so check back soon! Please be sure to let us know if you make anything interesting on the grill or try out any of our recipes.

Friday, July 27, 2012

From Grill To Crock Pot To Leftovers

As much as we love to experiment and try new things, we also love to spend as little as possible during weekly grocery shopping, which is why Megan and I plan ahead to interconnect our meals throughout the month. For today's entry in our cooking blog, we'll explain how we took one main item - homemade barbecue sauce - and took it from grill to crock pot to microwaved leftovers.

This particular sauce was actually the second barbecue sauce we ever made, which was taken in a much spicier direction than the first attempt with smoky raspberry BBQ sauce. While this was a successful creation, and I'd recommend anyone try if you want to start experimenting with your own sauces, we have since significantly changed up our recipe. We now use much fewer ingredients and generally don't use tomato paste, instead basing the sauce around soda. This lets us create interesting flavor bases, like root beer, cherry, or even apple, and using soda instead of water also eliminates the need for corn syrup, since the soda already has plenty of sugar.

Here's the main ingredients we used for this particular sauce experiment:


To make sure there aren't any clumps and the flavor remains consistent with each bite, we first grind up all the dry ingredients with a mortar and pestle.


While the dry ingredients are being ground up, Megan whisks together all the liquid ingredients in a large liquid measuring cup.


The two finally meet in a medium sauce pan on the stove over medium-high heat so that it can eventually reach a boil.


The dry and liquid ingredients are whisked together thoroughly until the mixture is uniform in texture and color.


After coming to a boil, the sauce is turned down to a low heat and simmered for as long as necessary for it to reduce down and become thick enough to use. This can take anywhere from 45 minutes to three hours, depending on which ingredients you are using and how much of any given ingredient you've thrown in.


The end result is a thick and delicious sauce that easily rivals anything you'll find in a bottle on the grocery store shelf.  Speaking of, we have now started reusing plastic bottles from the store, putting our homemade sauces into BBQ or ketchup squirt bottles so we don't have to throw them away every time.


The sauce was of course used for outdoor grilling (and you can see how we use BBQ sauce with ribs in our various pork rib blogs), but that wasn't its only application. To interconnect our meals and make use of this sauce for another tasty dinner, we put together another BBQ sauce centered meal using this beef chuck roast.  To get it ready, the roast is first seared over high heat on a metal skillet.


As the first side quickly browns, it's turned over so that each end gets cooked through and we get a uniform color.


The meat isn't completely cooked yet, but we're still going to pull it off the skillet and throw it in the crock pot for several hours. After being mostly heated through, the beef comes back out of the slow cooker out for slicing.


The whole roast is sliced into small pieces, so that each and every piece can be properly flavored by the BBQ sauce.


After the slicing is finished, the beef is returned to the crock pot for a final round of cooking.


The sauce goes in next, and everything is mixed together so all the beef is covered by delicious (and spicy!) sauce.


After the beef and sauce are cooked together we've got the beef equivalent of pulled pork ready to go on a sandwich!

As usual, we had a side salad to go with our meat-centered dinner. This time around we had a fruit-heavy salad, using strawberries and a fruit dressing.


The slow cooked beef is spooned onto a hamburger bun along with a few slices of cheddar. No extra condiments are required, but if you like it a little more moist, throw on some additional sauce.


This is Megan's finished plate, and she's gone with a poppyseed dressing instead and also sliced some cheese onto her salad.  These sandwiches are fairly quick to put together, since the crock pot does most of the work, and we've made a few variations on this basic meal. Coming up in another blog we'll cover a pork version using a five star apple BBQ sauce.


The slow cooker beef roast ended up making more meat than we could put away in one sitting, so the leftovers were re-purposed for a different meal the next day that provided more variety. Instead of having the same thing again, we reheated the leftover beef and spooned it over a bed of mashed potatoes, along with a side of veggies covered in seasonings.  By combining these different ingredients and basing our meals around one main item, we not only get a wide variety of delicious meals, but also save money at the grocery store.


Wednesday, July 25, 2012

Potato Salad: Spicy Southwest And Italian

Last month's experiments with putting new twists on old favorites included several different types of potato salad to go with all our mouth-watering barbecue fare.  We already went into detail on our standard vegetable potato salad as well as an out-of-this-world chicken bacon ranch variety, but the experimentation didn't stop there. Today we'll look at two more versions of this summer favorite: Italian and spicy southwest.


Megan and I keep a white board in our kitchen so we can write down ideas for interesting new meals whenever inspiration strikes, and while washing dishes one day after lunch we came up with a fantastic idea: what if we combined the best of both Italian pasta salad and potato salad into one delicious side?


Our Italian potato salad starts off with standard baking potatoes cut into wedges and boiled until tender. You could substitute any kind of potato you want here though, if another variety strikes your fancy.


When I think of pasta salad my mind usually brings up two ingredients first: Italian dressing and mozzarella. To make our combination of two different dishes really stand out, we went to the olive bar at our local grocery store and picked up fresh mozzarella balls marinated in seasoned olive oil.  "Buffalo" style mozzarella or any of the fresh varieties packed in small containers at the specialty cheese section of the grocery store are equally good options. Here I'm cutting them into halves to be tossed with the potatoes.


For color and to keep the Italian theme going, we also quartered grape tomatoes, which were the perfect size and texture for this collision of flavors.


Pasta salad frequently has a meat element, such as pepperoni. We found a bag of turkey pepperoni already in small coin shapes on clearance at Smith's to use, but any similar ingredient would work great.


Now we're mixing it all together, along with mayo and some Italian dressing to further combine the ideas of potato and pasta salad. Even with the tomato it all turned out a bland color though, which just wouldn't do...


So we upped the ante with diced orange bell peppers and plenty of green onion slices, adding both color and  more of a fun pasta theme.


This is our finished Italian potato salad, combining ideas from two different cultures into one perfect offering. The fresh mozza and grape tomatoes really make this dish an explosion of flavor, and the end result is good enough to dig into with a spoon instead of using as a side!


As our regular readers have probably figured out, we love using peppers (have you used our pepper comparison guide to try out your own pepper-based kitchen adventures yet?) and I like adding hot sauce to just about anything. Since our basic potato salad already features a load of veggies, why not tweak the recipe to go in a spicy Southwest direction? For our Southwest potato salad, we're starting with onion, red bell pepper, anaheim, and poblano. If you want it spicier, you could also add in serrano or jalapenos.


Each pepper or vegetable is diced up into small pieces, just large enough to provide a firm texture to every bite of soft boiled potato.


Everything gets tossed together as before in preparation for adding the final mayo concoction.


For this version of potato salad, we mixed together mayo with a white wine mustard and two types of hot sauce. The end result was the right balance of savory heat, but if you like it hot, hot, hot, ditch the Grey Poupon and go with spicy brown or a hot specialty mustard and put in as much sauce as you can handle.


After lightly beating it all together with a spoon a few times we had Southwest potato salad perfection to accompany delicious barbecued pork and chicken!


Thanks for checking in, and hope to see you again soon as we continue to try new things on our culinary travels. We'll be bringing you plenty of barbecued dinners, diner-style breakfasts, and much more throughout the rest of the summer.

Monday, July 16, 2012

Avocado Eggs "Benedict"

Today we're taking a little break from all the grilling to look at a fun (and quick!) breakfast creation we enjoyed a few days ago. We both love breakfast foods, and we've previously explored different ways to make flavor-packed meals like breakfast sandwiches and breakfast skillets.  While those are very tasty early morning meals, we also like to go with less heavy and fattening options than our normal breakfast choices from time to time.  For this egg-based meal, we took our inspiration from an article about twists on the classic eggs benedict recipe.


For our version of eggs "benedict," we're going to cover toast with an avocado mixture, plop on a poached egg, and then cover it with a drizzle of yogurt and dill.  Obviously it's not a real "benedict" without hollondaise sauce, but this is a much healthier version that still packs a whole lot of flavor. To start out with, Megan cut up some avocado that's going to be mashed up with seasonings.


The end result is very similar to guacamole, just without the lemon and using slightly different seasonings. We went with dill, salt, pepper, and some garlic powder (for a more in-depth look at making guacamole for breakfast meals, check out our blog on making breakfast burritos).


Next up is the poached egg.  Surprisingly, we'd actually never made eggs like this before, as scrambled is our go-to cooking method.  For poached eggs, heat up a pot of water until just before it starts to boil. Crack and egg and place it into a small dish or container so it retains its shape a bit. Quickly spoon the egg and white into the water, and then repeat with your remaining eggs.


Once all the eggs are in the nearly-boiling water, turn the heat off and let them cook for around 5 minutes for the perfect texture.  We did end up with some water that looked a bit like egg drop soup for our first attempt, but overall the eggs held their shape and we didn't lose too much of the whites.  We're looking forward to trying these again using different methods, such as putting the eggs in small metal containers so they hold their shape better.


To put together our avocado-based edition of eggs benedict, we first spread the guacamole mixture onto some wheat toast.

Then a still-steaming poached egg was placed on top of the toast and guacamole.


We spooned some plain yogurt over the toast and poached egg, and then topped with a small sprinkling of dill for extra flavor.


The next day we also tried a different version of this same breakfast to use up an ingredient that was nearing its expiration date. We had found some lemon and herb flavored Philadelphia cooking cream on clearance for just over a dollar and decided to try it out in place of the yogurt. For this second try, we switched the ingredients around and started with a layer of the cooking cream, and then topped the egg with a few spoonfulls of the avocado.  Both versions were equally good, although obviously the one with plain yogurt has less fat and calories.  This unique combination of flavors is well outside the norm for our breakfast options, and we're looking forward to putting this into the regular morning rotation.


Now that we've taken a little side trek into a quick breakfast meal, get ready for more fun backyard barbecue where we grill not only more ribs, but also head off the beaten path to grill pizza and stuffed tomatoes!

Tuesday, July 10, 2012

Grilling Season '12: Root Beer Babyback Ribs

It's been a heavy grill season so far this summer, and we're planning on keeping it going as long as the weather continues to hold. With record breaking heat in Montana this week we'll probably be grilling more than normal, as it's just too hot to be using the stove inside.

In the last few months we've made quite a few pork dishes using the grill, like the double pork rollup, the southwest pork salad, and several kinds of non-traditional pork and turkey burgers. Besides those mouth watering entrees, we've also been nailing down and perfecting our own personal techniques for barbecuing ribs, such as pork spareribs with store-bought sauce and rubs, as well as beef ribs with homemade smoky raspberry sauce.


Today we'll look at another pork rib creation, which ended up being one of our best yet with an incredibly unique combination of sweet and smoky flavors. This time around we wanted to make essentially everything on our own - starting with a root beer BBQ sauce for basting, a homemade dry rub, and a root beer injection.

If you haven't made your own BBQ sauce before, we definitely recommend you try it out.  The process is actually fairly simple once you get it down, and we've been making different batches about once every 2 - 3 weeks. To start our sauce, we're using ketchup, liquid smoke, molasses, onion and garlic powder, pepper, Worcestershire sauce, brown sugar, orange juice concentrate, and root beer instead of water.


All of the ingredients are whisked together thoroughly in a mixing bowl before getting poured into a medium sauce pan for cooking.


While preparing the BBQ sauce, we also started putting together the dry rub to go on the ribs. Rubs are incredibly easy to make, as its essentially just your favorite seasonings ground up and mixed together. For this rub, we used brown sugar, paprika, garlic salt, garlic powder, Mrs. Dash southwest seasoning, dry mustard, and ghost pepper salt.


All the ingredients are ground together with a mortar and pestle so there aren't any large clumps of any one seasoning.


Here we've got the base of our sauce, before being cooked, and our prepared rub getting ready to be used. If you plan on grilling a lot of meat over a period of time, it's a simple matter to triple or quadruple your recipe and store the leftover rub in tupperware containers. We ended up doing this for a later grilling experience when we made a cherry rub (to be shared on this blog soon!)


Before rubbing or injecting our babyback ribs, we placed a layer of plastic wrap down and trimmed off the excess fat.


First on is the rub, as the meat tends to get a bit messy once we start injecting or basting. Both sides are coated in a layer of the rub.


After the rub is poured on, then it's massaged into the meat by hand. At this point the aroma of the seasonings really starts to come out!


After both sides are coated and rubbed down, the plastic wrap is pulled up from either side so the meat is tightly wrapped up.


For a size comparison, here is the trimmed rack of babyback ribs next to the 2 liter bottle of root beer.


While the ribs sit in the fridge soaking in all the flavor from the rub, we've got all the ingredients for the BBQ sauce boiling in a medium saucepan on the stove.


After coming to a rolling boil, the heat is reduced and it simmers for 45 minutes or so until reducing down to the proper BBQ sauce consistency.


The sauce itself is slightly too thick to inject into the ribs, so we've mixed up some of the sauce with extra root beer and melted butter.


Now that the sauce and injection are complete, it's time to unwrap the pork, which has become a beautiful color from the rub. Pulling back that plastic wrap also makes the whole kitchen smell amazing!


The root beer BBQ sauce mixture is then injected directly into the meat, which makes every single bite have flavor all the way through.


When the injection process is done, the leftover sauce mixture is lightly brushed over the top and bottom of the ribs, and the rack is finally ready for grilling.


As with our previous ribs, we're using an indirect heating method, which is very important for large cuts of meat like this that will be on the grill for a few hours. If you place the ribs directly over coals they will end up burning and you'll get way more char on the outer layer than you want. For indirect heat, simply move the coals onto two separate sides of the grill, leaving a strip in the center where the meat can sit.


If you thought the rub and injection was the end of the flavor enhancing, you were wrong! Several times during the cooking process we baste the ribs with extra root beer BBQ sauce.


After being flipped over the ribs are already starting to look amazing and pick up a little bit of that smoky char.


When the first hour of cooking is done, we lay down a strip of tin foil, which further protects the meat from overcooking or burning.


Two and a half hours of grilling go by to achieve these perfectly cooked and sauced ribs, which will be tender enough to pull away from the bone easily but firm enough to have a fantastic texture you can sink your teeth into.


Each rib is cut apart from its neighbor as we get ready to plate up after a cooking adventure that lasted all afternoon.


With our ribs we're having some traditional favorites: a baked potato and a side salad with all the fixings, including croutons, shredded cheese, tomato, red bell pepper, and green onion.


In the background here you can see some of my homemade Thousand Island dressing topping the finished salad next to those finger-licking-good ribs.


These were some truly stellar ribs, and cooking them in the backyard with our own homemade rubs and sauces turns dinner into an event that lets us spend time together doing something we both love. Since this cookout we've also made other kinds of barbecue sauces inspired by soda flavors, such as orange and black cherry. Coming up we're looking forward to experimenting with whiskey and bourbon, as well as some more unique flavors like coffee. Stay tuned for more on grilling, as well as a return to some savory breakfast creations and other dinner favorites like chicken fried steak!